Mở đầu
Trong thời đại blockchain đang rất phát triển, rất nhiều những ứng dụng truyền thống đang dần chuyển dịch sang hướng phi tập trung.
Những ứng dụng này được gọi là decentralized application, hay gọi tắt là dapp.
Dapp hiện giờ hầu hết được xây dựng dưới dạng web app, bởi môi trường và các công cụ tương tác đã được hoàn thiện khá tốt, ví dụ như metamask, hay các dapp browser.
Về mặt lý thuyết, ta cũng hoàn toàn có thể xây dựng được các dapp trên mobile, song hiện giờ vẫn còn một rào cản khá lớn khi các app store truyền thống như google play hay app store chưa chấp nhận các app như vậy. Một phần vì lý do bảo mật, một phần cũng vì sẽ ảnh hưởng đến hệ thống in-app purchase của các store đó.
Hi vọng trong tương lai với sự hoàn thiện hơn của blockchain thì các store sẽ có các cơ chế thông thoáng hơn với dapp.
Để xây dựng dapp chúng ta có thể sử dụng javascript thuần, hay reactjs, hay vuejs đều được, các bạn có thể tham khảo thêm các bài viết sau đây:
- Plain: https://viblo.asia/p/xay-dung-ung-dung-phi-tap-trung-dapp-gAm5y8LLldb
- Reactjs: https://viblo.asia/p/xay-dung-ung-dung-phi-tap-trung-dapp-voi-reacjs-L4x5x8p15BM
- Vuejs: https://viblo.asia/p/xay-dung-ung-dung-phi-tap-trung-dapp-voi-vuejs-vyDZOaP95wj
Trong bài viết này mình sẽ hướng dẫn các bạn xây dựng một web dapp trên nển tảng ethereum bằng một engine game khá nổi tiếng Cocos Creator. Các bạn hoàn toàn có thể mở rộng nó để làm các web game tích hợp ethereum cho mình.
Note: Môi trường làm việc trong bài viết này là MacOS, tuy nhiên vẫn có thể chạy trên Window bình thường.
Cài đặt
Chúng ta cần cài đặt truffle để code contract, Cocos Creator để code một sample app đơn giản, và Metamask để tương tác với web dapp.
truffle
npm install -g truffleCocos Creator
Download và cài đặt tại đây: https://www.cocos.com/en/creator
Metamask
Cài đặt chrome extension tại đây: https://chrome.google.com/webstore/search/metamask?hl=en-US
Init project
Ứng dụng của chúng ta sẽ có 2 phần, phần contract và phần game, ta sẽ lần lượt tạo từng folder:
1 - Tạo thư mục gốc của ứng dụng:
mkdir hello-world && cd hello-world2 - tạo thư mục contract:
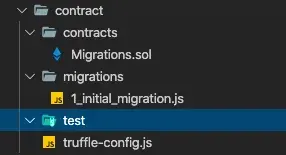
mkdir contract && cd contract3 - init truffle project
truffle initkhi này chúng ta sẽ có được một project để bắt đầu code contract rồi.
4 - init game project
Ta sẽ khởi động Cocos Creator lên và tạo một project mới, để project đơn giản và dễ hiểu nhất ta sẽ tạo project theo template Hello-world
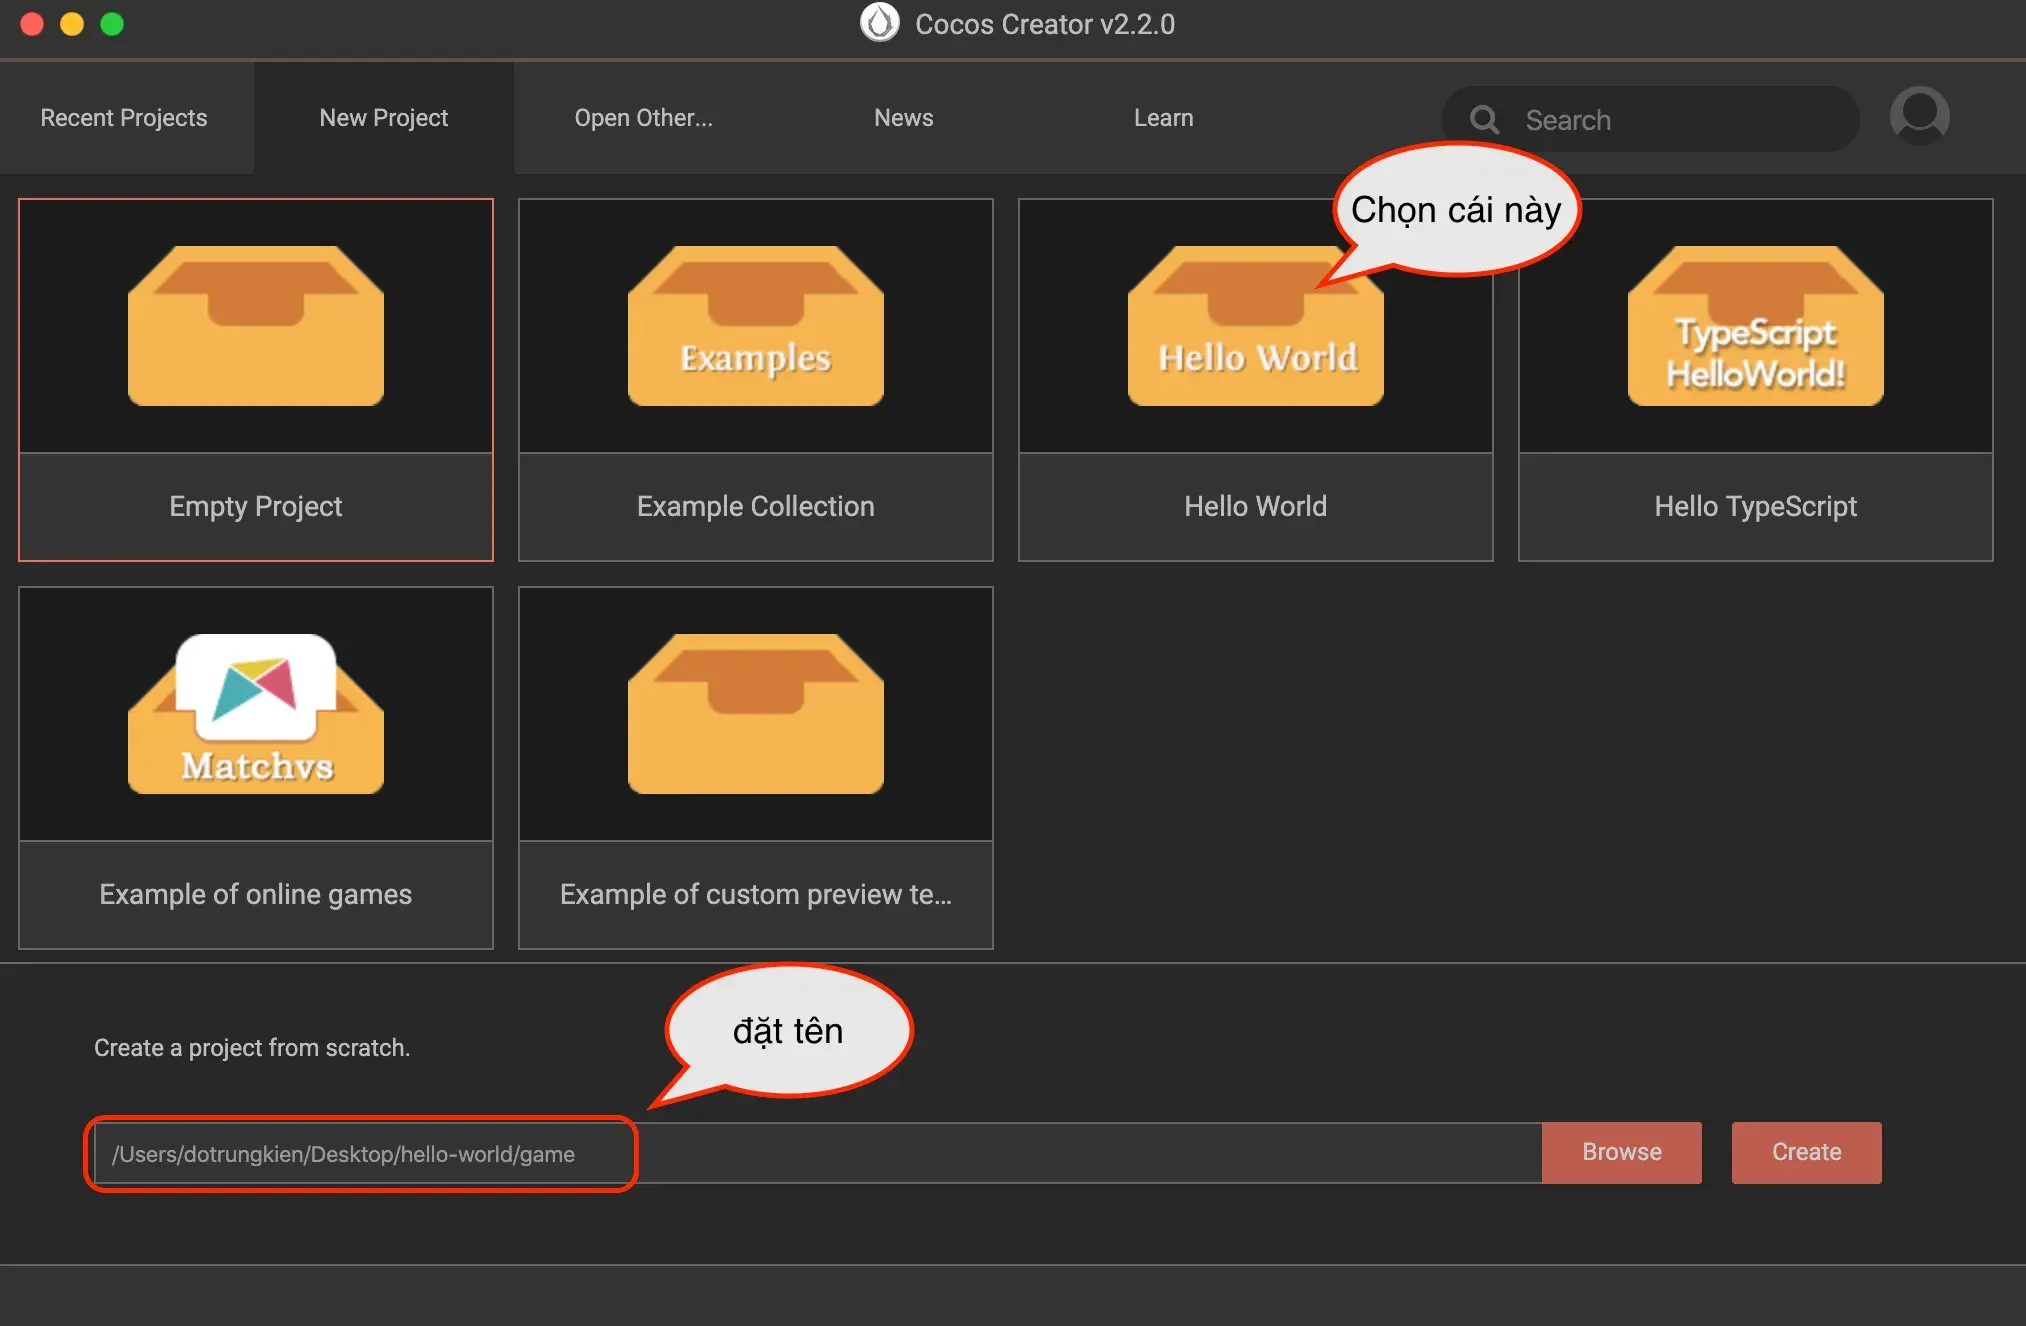
OK ta đã sẵn sàng để vào bước phát triển rồi.
Contract Development
Trong bài này ta sẽ làm một contract vô cùng đơn giản, chỉ có 2 phương thức và 1 biến mà thôi.
Contract
Vào thư mục contracts và tạo một file mới SimpleStore.sol với nội dung như sau:
pragma solidity ^0.5.0;

contract SimpleStore {
  uint256 value;

  event NewValueSet(uint256 indexed _value, address _sender);

  function set(uint256 newValue) public {
    value = newValue;
    emit NewValueSet(value, msg.sender);
  }

  function get() public view returns (uint256) {
    return value;
  }
}
ở đây ta sẽ dùng phiên bản solidity 0.5.0.
Truffle config
tại truffle-config.js ta sẽ config tất cả những thông tin về chain, compiler, accounts…
module.exports = {
  contracts_build_directory: "../game/assets/Contracts",
  networks: {
    development: {
      host: "127.0.0.1",
      port: 8545,
      network_id: "123456789",
    },
  },
};
Ta sẽ build contracts vào luôn một thư mục bên trong thư mục game, để chút nữa ta có thể sử dụng nó trong Cocos.
Với chain, để đơn giản nhất ta sẽ sử dụng một local chain, chạy bởi ganache-cli.
Chạy local chain
Nếu bạn chưa cài đặt ganache-cli thì hãy tiến hành cài đặt trước.
npm install -g ganache-cliTa sẽ chạy một local chain với chain id là 123456789 bằng lệnh:
ganache-cli -i 123456789Khi này đã có một chain chạy tại địa chỉ http://localhost:8545 và 10 account, mỗi account có 100 ETH như thế này, mỗi account tương ứng với một private key bên dưới.
Available Accounts
==================
(0) 0x7c28281fb4fa65b40e3f47af4f88bfe82224090b
(1) 0x02c5c736031b4fa576cb911ddbb3e55eb741f134
(2) 0x905aef31f11b49923a6c377f83dec84567b90a25
(3) 0x3429059ea3d218c43266998cfed14e7f85f8d372
(4) 0x0ae76d77a96b34aff16f8910078ae2cf4e001768
(5) 0x148ffe781de6676fde20c2c6ff5bb022e80a9748
(6) 0x776be00b63a9d8692c1a4ce4d6baec1101fc913e
(7) 0x977eded9ac70b067c7cb840779ea9f46e8a89afb
(8) 0x01452fe9da1362ab8ace90d87056a4e5cfc22766
(9) 0xb422c3fafc0514cb733f83294d1681d6e3e8fc03

Private Keys
==================
(0) 26b3f59a6fec532ffc45f121bd2ba3c088666a34136669df03b315e938330d58
(1) 57adbbb3ba0aa454b3b85a87a6fc73e5ded11748e9323d0ba3866dca40e2e301
(2) db4093821ee1f362897847ac59851adea4a4aeeba22404321978111a02236174
(3) 3e953bb74802810739dec2df4cf2eb0e36d6ac665836a3c5658e35e4ef64814b
(4) 3ad55f2e89c7fe489a0cc04dd3574df69466656a98e92be78c9599a442370333
(5) ccc5585cbcbb0405fa5ea2aa48775e6ce7f75b819477c51396084b0b5ec3120d
(6) 77cab936b6001ad056cace50db94bacbec066fdf8842dbe598d7f656a18ec620
(7) 718159194d52ca85fad5dcaac0e9a9269994b6e3301cb233e107b4a71403d172
(8) debf1a6e65da5b3314de06dcefb6fec85065c9c74a42a8660a61d6786b322ba7
(9) 4c97648a754569ef7cfbfafeeb3df4213eea2fb8f1ced9ff38ade25e1ad688c5
hãy lưu lại private key đầu tiên để chút nữa ta sẽ sử dụng account tương ứng trong metamask.
Compile và Migration
Ta sẽ tiến hành compile contract để đảm bảo rằng contract của chúng ta không có lỗi:
truffle compilekết quả
> Compiling ./contracts/Migrations.sol...
> Compiling ./contracts/SimpleStore.sol...
> Writing artifacts to ./../game/assets/Contracts
Để migration contract của chúng ta lên local chain, ta sẽ phải tạo thêm một file migration cho nó.
Trong thư mục migrations tạo thêm file 2_simple_store_migration.js với nội dung như sau:
const SimpleStore = artifacts.require("SimpleStore");

module.exports = function (deployer) {
  deployer.deploy(SimpleStore);
};
Và tiến hành migrate
truffle migrate --network developmentkết quả
Starting migrations...
======================
> Network name:    'development'
> Network id:      123456789
> Block gas limit: 6721975


1_initial_migration.js
======================

   Deploying 'Migrations'
   ----------------------
   > transaction hash:    0xaa2af826be86a1561c79bbff42c1c8646921e327609995b486c0b71eb920edc4
   > Blocks: 0            Seconds: 0
   > contract address:    0x6E896215aD8E6c9d335AAc6642747Cfa96b88511
   > account:             0x7c28281Fb4FA65B40E3f47af4F88BFe82224090b
   > balance:             99.99430184
   > gas used:            284908
   > gas price:           20 gwei
   > value sent:          0 ETH
   > total cost:          0.00569816 ETH

   > Saving artifacts
   -------------------------------------
   > Total cost:          0.00569816 ETH


2_simple_store_migration.js
===========================

   Deploying 'SimpleStore'
   -----------------------
   > transaction hash:    0x70d5bfd2b6f35bced155e93422f7f73a04f475f604e158b766421690ee730882
   > Blocks: 0            Seconds: 0
   > contract address:    0xaC78cEE4872Dd65945a22C66DFCB2d55a9cc65DC
   > account:             0x7c28281Fb4FA65B40E3f47af4F88BFe82224090b
   > balance:             99.99139726
   > gas used:            145229
   > gas price:           20 gwei
   > value sent:          0 ETH
   > total cost:          0.00290458 ETH

   > Saving artifacts
   -------------------------------------
   > Total cost:          0.00290458 ETH


Summary
=======
> Total deployments:   2
> Final cost:          0.00860274 ETH
OK vậy là xong phần contract.
Game Development
Hãy mở Cocos Creator và chọn project game mà chúng ta vừa tạo.
Scene
Mở đầu chúng ta sẽ có một scene helloworld với chỉ có một background, một logo và một label.
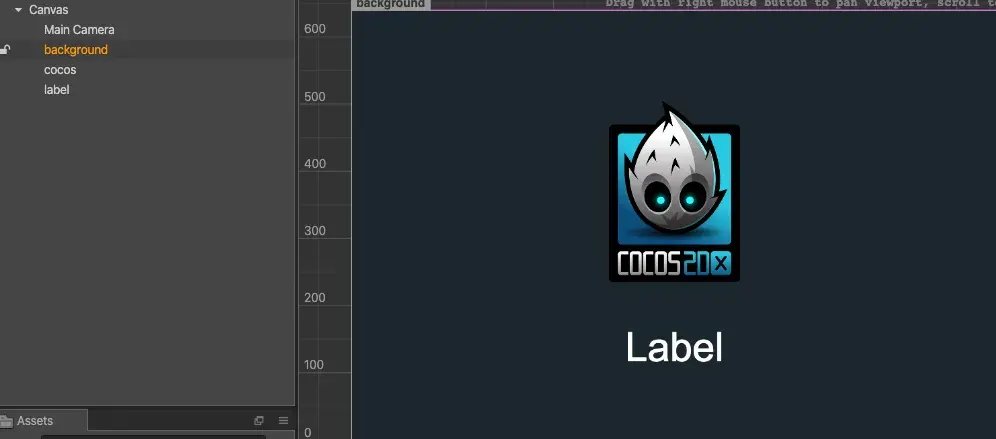
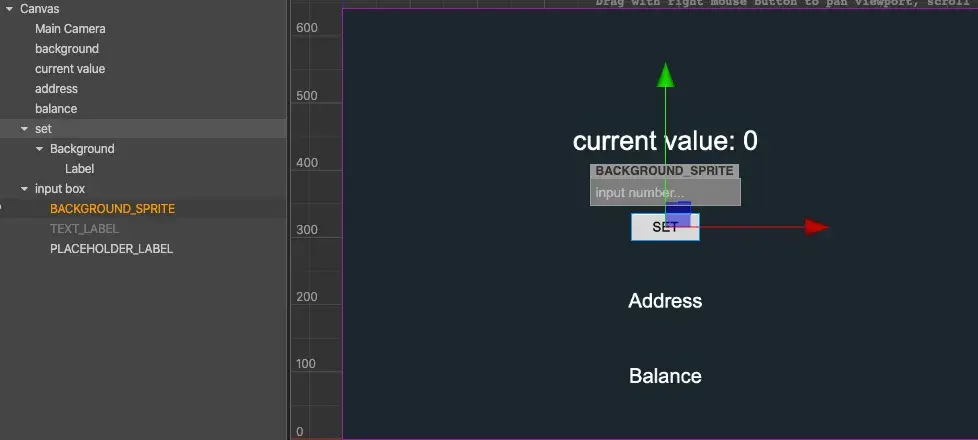
Ta sẽ tiến hành xóa logo, thêm một label cho Address, một label cho Balance, một inputBox cho giá trị value trong contract, và một button để set giá trị cho value.
Scene sẽ trở thành như sau:
Script
Để kết nối với blockchain từ game, ta cần phải sử dụng thư viện Web3js, trong bài viết này chúng ta sử dụng phiên bản 1.0.0-beta36.
Download tại đây https://cdn.jsdelivr.net/gh/ethereum/[email protected]/dist/web3.min.js.
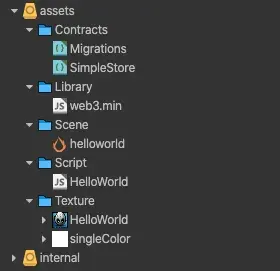
Tạo một thư mục Library trong thư mục game và đưa web3.min.js vào đây. Thư mục game của chúng ta sẽ trông như sau:
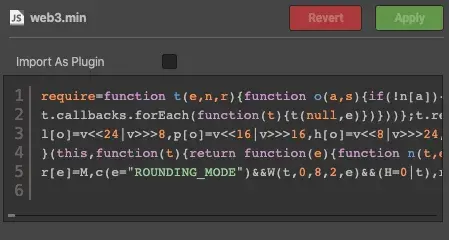
click vào web3.min.js và đảm bảo rằng checkbox import as plugin không được check.
OK, giờ ta sẽ chỉnh sửa script Hello World như sau:
const Web3 = require("web3.min");
const GAS_PRICE_DEFAULT = "20000000000";

cc.Class({
  extends: cc.Component,

  properties: {
    currentValueLabel: {
      default: null,
      type: cc.Label,
    },
    addressLabel: {
      default: null,
      type: cc.Label,
    },
    balanceLabel: {
      default: null,
      type: cc.Label,
    },
    inputBox: cc.EditBox,
    contractABI: cc.JsonAsset,
  },

  onLoad: function () {
    this.web3 = null;
    this.web3Provider = null;
    this.web3ProviderName = "metamask";
    this.contract = null;
    this.currentValue = 0;
    this.address = "0x";
    this.balance = 0;
    this.addressLabel.string = "Address: " + this.address;
    this.balanceLabel.string = "Balance: " + this.currentValue;

    this.updateCurrentValue(0);

    this.initWeb3();
  },

  initWeb3() {
    const isWeb3Enabled = () => !!window.web3;
    if (isWeb3Enabled()) {
      this.web3 = new Web3();

      //Request account access for modern dapp browsers
      if (window.ethereum) {
        this.web3Provider = window.ethereum;
        this.web3.setProvider(this.web3Provider);
        window.ethereum
          .enable()
          .then(accounts => {
            this.initAccount();
          })
          .catch(error => {
            console.error(error);
          });
      }
      //Request account access for legacy dapp browsers
      else if (window.web3) {
        this.web3Provider = window.web3.currentProvider;
        this.web3.setProvider(this.web3Provider);

        this.initAccount();
      }
    } else {
      console.error(
        "You must enable and login into your Wallet or MetaMask accounts!"
      );
    }
  },
  initAccount() {
    this.web3.eth.getAccounts().then(accounts => {
      if (accounts.length > 0) {
        this.address = accounts[0].toLowerCase();
        this.addressLabel.string = "Address: " + this.address;
        this.initContract();
        this.updateBalance();
      } else
        console.error(
          "You must enable and login into your Wallet or MetaMask accounts!"
        );
    });
  },

  initContract() {
    let networks = { main: "1", ropsten: "3", kovan: "42", rinkeby: "4" };
    this.web3.eth.net.getNetworkType().then(netId => {
      this.contract = new this.web3.eth.Contract(
        this.contractABI.json.abi,
        // this.contractABI.json.networks[networks[netId]].address
        this.contractABI.json.networks["123456789"].address
      );
    });
  },

  updateBalance() {
    this.web3.eth.getBalance(this.address, (err, balance) => {
      if (err) {
        console.error(err);
        return;
      }
      this.balanceLabel.string = cc.js.formatStr(
        "Balance: %d ETH",
        parseInt(this.web3.utils.fromWei(balance))
      );
    });
  },

  getValue() {
    this.contract.methods
      .get()
      .call({
        from: this.address,
      })
      .then(val => {
        this.updateCurrentValue(val);
        // console.log('get current value: ', val);
      });
  },

  setValue() {
    this.contract.methods
      .set(this.inputBox.string)
      .send({
        from: this.address,
        gas: 250000,
        gasPrice: GAS_PRICE_DEFAULT,
      })
      .on("transactionHash", hash => {
        // console.log('transactionHash: ', hash);
      })
      .on("receipt", receipt => {
        this.getValue();
      })
      .on("error", error => {
        console.error("endgame error: ", error);
      });
  },

  updateCurrentValue(value) {
    this.currentValueLabel.string = "Current Value: " + value;
  },
});
Giải thích:
- khai báo các label và input box ta vừa định nghĩa bên trên, ở đây đáng chú ý là ta sẽ có một biến
contractABI, đây chính là contract mà ta đã build bằng lệnhtruffle migrate --network developmentở bên trên.
contractABI: cc.JsonAsset;- tại
onLoad, ta sẽ tiến hành khởi tạo các thuộc tính cần thiết, cũng như web3
onLoad: function() {
  this.web3 = null;
  this.web3Provider = null;
  this.web3ProviderName = 'metamask';
  this.contract = null;
  this.currentValue = 0;
  this.address = '0x';
  this.balance = 0;
  this.addressLabel.string = 'Address: ' + this.address;
  this.balanceLabel.string = 'Balance: ' + this.currentValue;
  this.updateCurrentValue(0);
  this.initWeb3();
},
- Tại
initWeb3, ta sẽ detect network ta đang dùng hiện tại và tạo ra một web3 instance
if (window.ethereum) {
  this.web3Provider = window.ethereum;
  this.web3.setProvider(this.web3Provider);
  window.ethereum
    .enable()
    .then(accounts => {
      this.initAccount();
    })
    .catch(error => {
      console.error(error);
    });
} else if (window.web3) {
  this.web3Provider = window.web3.currentProvider;
  this.web3.setProvider(this.web3Provider);

  this.initAccount();
}- ta sẽ lấy account đầu tiên trong số các account của ganache-cli và update balance cho nó, đồng thời tạo một instance của contract
SimpleStoragechúng ta đã code trên kia.
initAccount() {
  this.web3.eth.getAccounts().then(accounts => {
    if (accounts.length > 0) {
      this.address = accounts[0].toLowerCase();
      this.addressLabel.string = 'Address: ' + this.address;
      this.initContract();
      this.updateBalance();
    } else console.error('You must enable and login into your Wallet or MetaMask accounts!');
  });
},

initContract() {
  let networks = { main: '1', ropsten: '3', kovan: '42', rinkeby: '4' };
  this.web3.eth.net.getNetworkType().then(netId => {
    this.contract = new this.web3.eth.Contract(
      this.contractABI.json.abi,
      // this.contractABI.json.networks[networks[netId]].address
      this.contractABI.json.networks['123456789'].address
    );
  });
},

updateBalance() {
  this.web3.eth.getBalance(this.address, (err, balance) => {
    if (err) {
      console.error(err);
      return;
    }
    this.balanceLabel.string = cc.js.formatStr(
      'Balance: %d ETH',
      parseInt(this.web3.utils.fromWei(balance))
    );
  });
},- Cuối cùng ta sẽ cài đặt 2 hàm
setValuevàgetValuetương ứng với hai hàmsetvàgettrongSimpleStoragecontract. Lưu ý rằng Cocos Creator chưa supportasync/awaitnên buộc ta phải xử lý các bất đồng bộ bằng cách wrap và chain promise.
getValue() {
this.contract.methods
.get()
.call({
from: this.address
})
.then(val => {
this.updateCurrentValue(val);
// console.log('get current value: ', val);
});
},
setValue() {
this.contract.methods
.set(this.inputBox.string)
.send({
from: this.address,
gas: 250000,
gasPrice: GAS_PRICE_DEFAULT
})
.on('transactionHash', hash => {
// console.log('transactionHash: ', hash);
})
.on('receipt', receipt => {
this.getValue();
})
.on('error', error => {
console.error('endgame error: ', error);
});
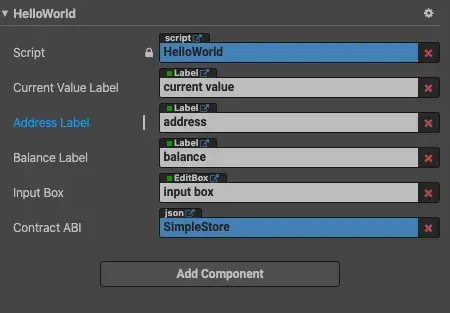
},ok script đã sẵn sàng, kết nối đã sẵn sàng, quay trở lại scene, kéo các biến cần thiết từ scene vào trong script HelloWorld:
Test game
Giờ là lúc play, nhớ chọn Browser và nhấn Play, ta sẽ tới địa chỉ http://localhost:7456/.
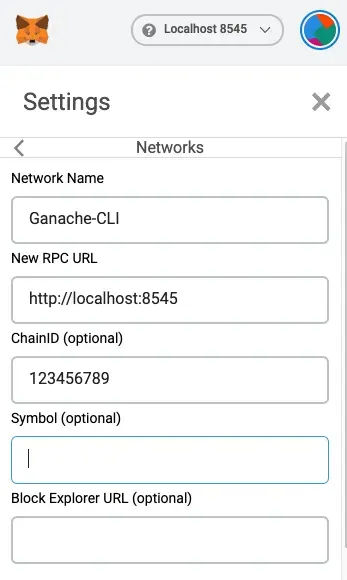
Khi này ta cần check lại network đã setup ở Metamask xem đã đúng local chưa. Nếu chưa đúng ta sẽ phải thêm một Custom RPC như sau:
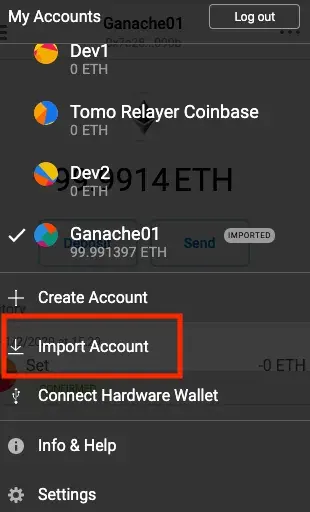
Sau đó tiến hành import account:
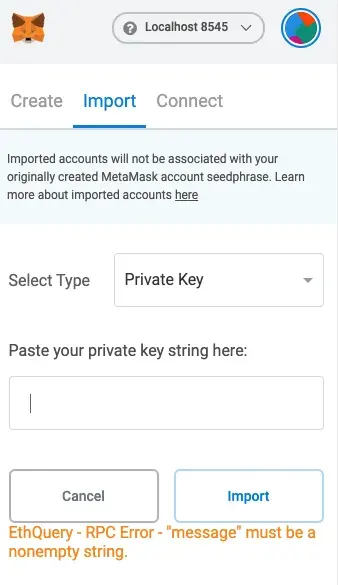
Sau đó ta sẽ nhập vào private key đầu tiên ở bên trên khi ta chạy ganache-cli lúc nãy:
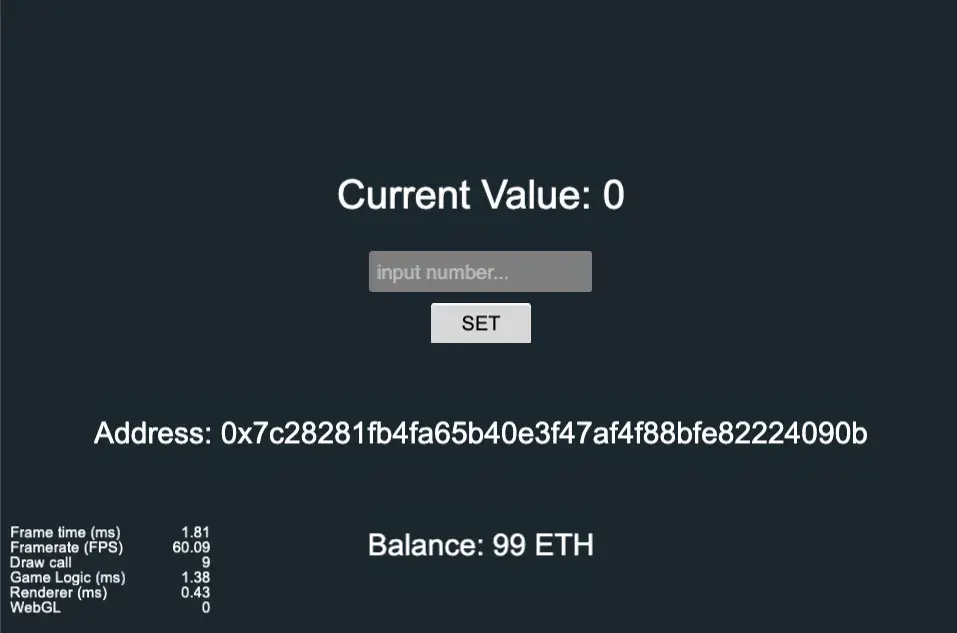
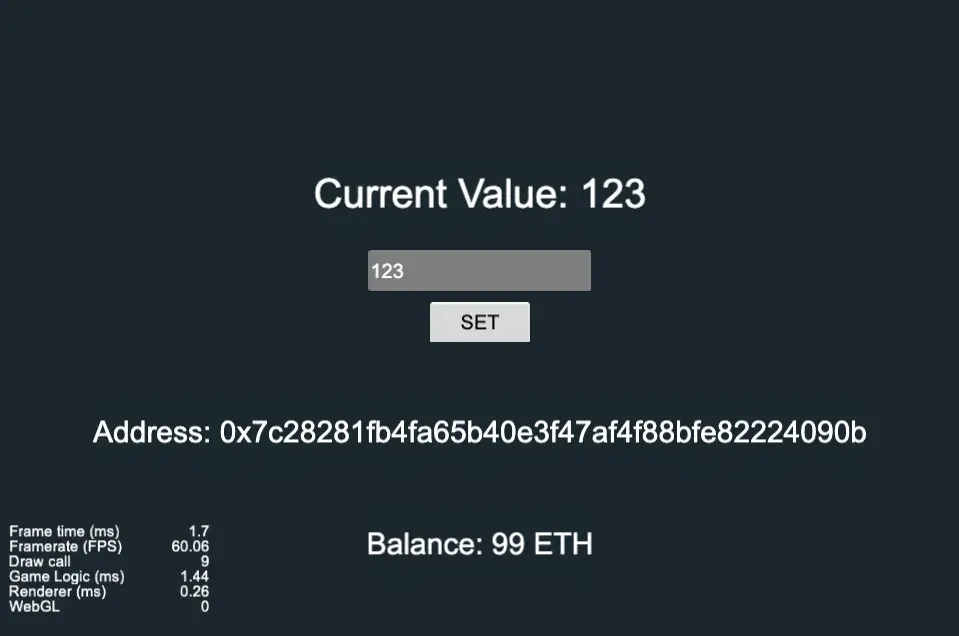
Ok, mọi thứ đã hoàn tất, khi này scene của chúng ta sẽ trông như sau:
set thử một giá trị xem sao, ví dụ 123, khi này metamask sẽ hiện ra popup như sau:
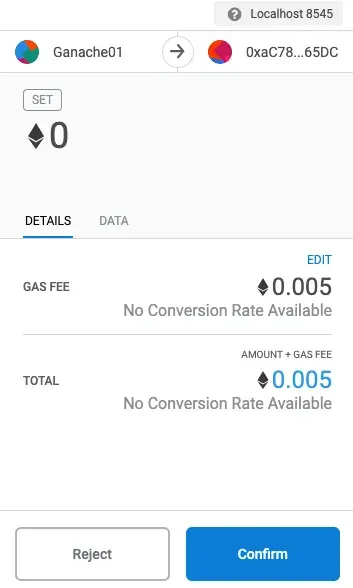
Confirm và chờ một chút, ta sẽ thấy transaction hoàn thành, và giá trị của chúng ta đã được update thành 123:
All done!
Kết luận
Vậy là chúng ta đã hoàn thành một ứng dụng vô cùng đơn giản với Cocos Creator tích hợp với Ethereum Blockchain rồi.
Dù chức năng chỉ là minimum nhưng ta hoàn toàn có rất nhiều hướng để phát triển. Cocos vốn là một engine nổi tiếng để làm game, do đó ta có thể xây dựng được các game trên đó rất dễ dàng.
Đồng thời ngoài localchain, bằng cách tương tự, ta cũng có thể deploy và kết nối đến các chain khác như Main chain, Ropsten, Rinkeby, Kovan, Loom, Tomo…
Hi vọng chúng ta đã có những trải nghiệm tích cực :D
Enjoy coding!